When you’re planning a roof replacement or dealing with storm damage in Northwest Indiana, the roofing terms thrown around by contractors and insurance adjusters can sound like a foreign language. Understanding this vocabulary isn’t just about keeping up with the conversation — it’s about protecting one of your home’s most important investments. At Goodwin Construction, we believe an informed homeowner is a confident homeowner, which is why we’ve put together this plain-language guide to the roofing terms you’re most likely to hear during an inspection, estimate review, or insurance claim.
Whether you’re noticing granules in your gutters after a hailstorm, comparing proposals from different contractors, or trying to make sense of what an adjuster wrote in your claim summary, this guide breaks down the common roofing terms homeowners encounter — without the industry jargon that often leaves folks scratching their heads.
Parts of Your Roof: The Structural Roofing Terminology You Should Know
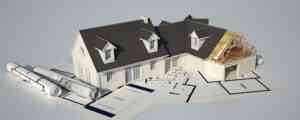
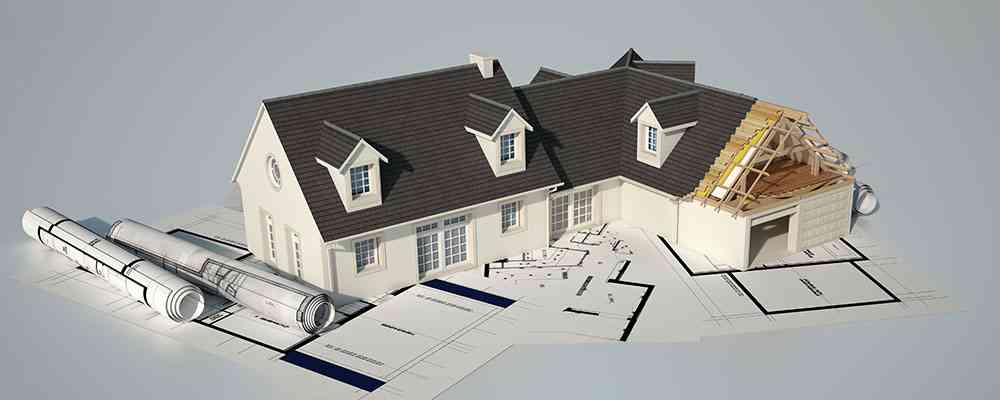
Before diving into materials and products, it helps to understand the anatomy of a roof. These structural roofing terms describe the physical parts of your home’s roofing system, and they’ll come up in nearly every conversation with a contractor.
Roof decking (also called sheathing): The wooden foundation — usually plywood or oriented strand board (OSB) — that everything else is attached to. If roof decking gets wet from a leak, it can rot and need replacement, which is why a quality underlayment matters so much.
Rafters: The angled structural boards that run from the top of your home’s walls up to the peak of the roof. Rafters support the decking and everything above it.
Ridge: The horizontal line at the very top of your roof where two sloped sides meet. It’s the highest point of the roof structure.
Hip: An external angle where two sloped roof planes meet. A hip roof has slopes on all four sides that come together at hips instead of gables.
Valley: The internal angle formed where two roof slopes meet, creating a V-shaped channel. Valleys handle a large volume of water runoff and are one of the most common leak points on any roof.
Eaves: The lower edge of the roof that overhangs the exterior walls of your home. Eaves help direct water away from the foundation and protect siding from rain.
Fascia: The vertical trim board running along the edge of the eaves, typically where gutters are attached. Fascia gives your roofline a finished appearance and covers the ends of the rafters.
Soffit: The horizontal surface underneath the overhang of the eaves. Soffits often contain vents that allow air to circulate into the attic.
Gable: The triangular portion of a wall between the edges of a sloped roof. Gable roofs are the most common roof style on North American homes.
Dormer: A roofed structure that projects outward from a sloped roof, usually containing a window. Dormers add character and interior headroom, but they also introduce extra flashing and seams that require careful installation.
Roofing Materials Every Homeowner Should Recognize
The second category of common roofing terms covers the actual materials that make up your roof. Knowing the difference between a 3-tab shingle and an architectural shingle, for example, can significantly affect your budget, warranty, and curb appeal.
Asphalt shingles: The most popular residential roofing material in the country. Asphalt shingles consist of a fiberglass mat coated in asphalt and covered with mineral granules that protect against UV rays and add color to the finished roof.
3-tab shingles: A basic, flat-looking asphalt shingle with three distinct cut-outs (or tabs) along the bottom edge. They’re budget-friendly but generally less durable than their upgraded counterparts.
Architectural shingles: Also called dimensional or laminated shingles, these are made of multiple layers bonded together to create a thicker, more three-dimensional appearance. Most new roofs in Northwest Indiana use architectural shingles because of their superior durability and aesthetic appeal.
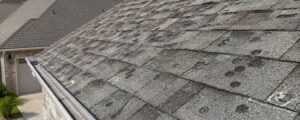
Granules: The small mineral particles embedded on the surface of asphalt shingles. Granules provide fire resistance, block harmful UV rays, and give shingles their color. When you see piles of these in your gutters, it’s often a sign that your shingles are aging.
Ridge cap shingles: Specially designed shingles that cover the ridges and hips of your roof. They’re thicker and more flexible than field shingles so they can bend over the peak without cracking.
Starter shingles (or starter strip): The first row of shingles installed along the eaves and rakes. Starter shingles include a strip of adhesive that helps seal down the first course of shingles, improving wind resistance — which matters a lot during Indiana thunderstorms.
Drainage, Ventilation, and Waterproofing Roof Replacement Terms
No roof performs well without proper water management and airflow. The following roof replacement terms describe the systems that keep moisture out and let your attic breathe.
Underlayment: A synthetic or felt material installed directly on top of your roof decking, beneath the shingles. Underlayment is your roof’s secondary line of defense — if water somehow gets past the shingles, a quality underlayment helps prevent it from reaching the decking below.
Ice and water shield: A self-adhering waterproof membrane installed along eaves, in valleys, and around roof penetrations. In Northwest Indiana’s winters, ice dams can force meltwater backward under shingles, and ice and water shield is what stops that water from leaking into your home.
Flashing: Thin pieces of metal (usually galvanized steel or aluminum) installed at any transition point where water could sneak in — around chimneys, skylights, vent pipes, walls, and valleys. Damaged or poorly installed flashing is one of the most common causes of roof leaks.
Drip edge: A rigid metal strip installed along the eaves and rakes of the roof. Drip edge directs water away from the fascia and into the gutters, preventing water from wicking back under the shingles and rotting the decking.
Attic ventilation: The system of intake and exhaust vents that allows air to move through your attic. Good ventilation prevents heat and moisture buildup that can warp decking, shorten shingle lifespan, and encourage mold growth.
Ridge vent: A continuous exhaust vent that runs along the peak of the roof, hidden beneath the ridge cap shingles. Paired with soffit vents for intake, ridge vents allow hot, moist attic air to escape naturally.
Pipe boot (or vent pipe collar): The flexible rubber or metal flashing that seals around plumbing vent pipes where they exit the roof. These tend to crack and fail before the shingles around them, so they’re always worth checking during an inspection.
Measurement and Installation Roofing Vocabulary
When you receive an estimate or insurance scope of work, you’ll see specific roofing vocabulary used to describe how much material your project needs and how steep your roof is. Getting comfortable with these measurement terms helps you understand what you’re paying for — and why.
Square: The standard unit of measurement in roofing. One square equals 100 square feet of roof area. A typical single-family home might have 20 to 30 squares, and shingle pricing, labor estimates, and material orders are all calculated this way.
Roof pitch (or slope): The steepness of your roof, expressed as a ratio of rise over run. A 6:12 roof pitch, for example, means the roof rises 6 inches for every 12 inches of horizontal distance. A steeper roof pitch often requires more labor and safety equipment, which affects pricing.
Bundle: A package of shingles. Most architectural shingles come three bundles to a square, though the count varies by manufacturer and shingle weight.
Course: A single horizontal row of shingles running the length of the roof. Roofers install shingles course by course, starting at the bottom and working upward.
Exposure: The portion of each shingle that remains visible after the next course is installed above it. Standard asphalt shingle exposure is around 5 to 5⅝ inches.
Penetration: Anything that passes through the roof surface — chimneys, plumbing vents, exhaust fans, skylights, and so on. Every penetration needs proper flashing, since these spots are prone to leaks.
Tear-off: The process of removing your existing roof down to the decking before installing a new one. A full tear-off is almost always the better choice over a “layover” because it lets the crew inspect and repair the decking underneath.
Why Knowing Common Roofing Terms Actually Matters
Homeowners rarely think about their roof until something goes wrong. Then, suddenly, they’re standing on the ground staring up at a contractor pointing out “damaged ridge cap shingles along the hip” or reading an adjuster’s report mentioning “missing granules” and “compromised flashing at the chimney.” Without the right vocabulary, it’s easy to feel lost — and easy to be taken advantage of by less-than-honest contractors.
The problem: Roofing is one of the most expensive repair projects a homeowner will ever undertake. Without understanding basic roofing terms, it’s nearly impossible to compare estimates fairly, evaluate whether a contractor is cutting corners, or advocate for yourself during an insurance claim.
The impact: Homeowners who don’t know their roofing vocabulary often overpay for services, miss warning signs of storm damage, accept partial insurance payouts when a full replacement is warranted, or hire contractors who skip essential components like starter shingles, drip edge, or proper ice and water shield in valleys. Over time, these shortcuts lead to leaks, rotted decking, and premature roof failure that the homeowner ends up paying to fix a second time.
The solution: Familiarizing yourself with the common roofing terms in this guide — and choosing a contractor who takes time to explain them clearly — puts you back in control. A trustworthy roofer should welcome your questions, walk you through the scope of work item by item, and be willing to show you photos of any damage or areas of concern before you sign anything.
Next Steps: Putting Your New Roofing Vocabulary to Work
Now that you’re familiar with the essential roofing terminology, here’s how to put that knowledge to practical use on your next project or inspection:
1. Schedule a thorough roof inspection. Ask the inspector to walk you through what they find using the specific roofing terms you’ve learned. Questions like “Is the flashing around the chimney still in good shape?” or “What does the decking look like near the valleys?” show contractors that you’re engaged and informed.
2. Review your estimates carefully. A detailed proposal should list out underlayment type, ice and water shield placement, starter shingles, drip edge, ridge cap shingles, number of squares, and ventilation components. If those items aren’t spelled out, ask why.
3. Document everything after a storm. If you experience hail, high wind, or other severe weather, take photos and contact a reputable contractor for an inspection before filing an insurance claim. Having a professional assessment — with the right roofing terms used correctly — strengthens your claim significantly.
4. Ask about manufacturer certifications. Credentials like “GAF Certified” or “Licensed and Insured” matter. Certified contractors have been trained by the manufacturer and can typically offer enhanced warranties that independent contractors cannot.
5. Don’t be afraid to ask questions. Any contractor worth hiring will gladly explain unfamiliar roofing terms. If you ever feel rushed, talked down to, or pressured into a quick decision, that’s a red flag — regardless of what the estimate says.
Trust Goodwin Construction for Honest Answers to Your Roofing Terms Questions
As a family-owned exterior remodeling company serving LaPorte County, Porter County, Starke County, and the surrounding Northwest Indiana communities, Goodwin Construction has built our reputation on honest communication and quality craftsmanship. We’re licensed and insured, BBB Accredited, and GAF Certified — but more importantly, we take the time to explain roofing terms in plain English so every homeowner we work with knows exactly what we’re proposing and why.
Whether you’re dealing with storm damage, planning a proactive roof replacement, or simply want a professional inspection of your current roof, we’d love to help you navigate the process. Free, no-obligation estimates are always part of our approach, and we’re happy to walk you through the findings using the common roofing terms covered in this guide so you feel informed every step of the way.
Ready to work with a Northwest Indiana roofing company that puts your understanding first? Contact Goodwin Construction today or call us directly at 219-508-0308 to schedule your free roof inspection and estimate. We look forward to helping you protect your home for years to come.